Whether you are a photographer who takes senior photos or a parent of a high school senior frantically searching Google for “How to change a photo to 300 DPI”, I’ve got you covered. In this blog I am going to explain what DPI means and how to easily change your senior photo to 300 DPI in Photoshop, Lightroom, and in Mac Preview, in order to have it ready to submit to the yearbook.
What does DPI mean?
High schools now will send out a yearbook photo requirement telling parents that they need to submit a photo of their senior with “300 DPI” but what does that mean?
DPI stands for Dots Per Inch. Yearbooks will ask for 300 DPI because this will correlate to the printing of an image. A printer will look at how many visible dots per inch to print. If the DPI count is too low when printing comes around, your picture could turn out more blurry than others. A higher number of DPI will allow a photo to print a smaller image at a higher quality.
DPI vs PPI
DPI is different than PPI, which stands for Pixels Per Inch. Pixels are what your computer monitor looks at when viewing/editing an image – how many pixels per inch that will be visible when you zoom far enough in. The higher the resolution of a photo, the higher the PPI and the DPI will be, and the bigger you will be able to blow up or zoom in on a photo and still see a clear/sharp image.
DPI and PPI have a 1:1 ratio. For example, if an image is 4 inches wide, and has a resolution of 300 DPI, the image will be 1200 pixels wide (there are still 300 pixels per inch).
The easiest way to differentiate DPI and PPI in my mind, is that while they both reflect on the resolution of an image, DPI is what a printer looks at, and PPI is what a computer looks at, when viewing an image.
The Importance of Crop Size
It is important to note that your crop size when adjusting your DPI will play an important roll in the overall quality of your image.
I’ve noticed that High Schools will be very careful to state that they want the image resized to 300 DPI, but they will often fail to specify how many inches they want the image to be. An image “cropped to 2×3” dimensions is not the same as being resized to 2×3 inches.
If the yearbook did ask for the photo to be “2×3 inches with 300 DPI” then the image would be 600×900 pixels. If someone submits an image that is 300 DPI but cropped to fit the 2×3 dimensions but not resized in inches, the file size could end up being considerably larger. For example: 4×6 dimensions is the same as 2×3, but if the image is resized to 4×6 inches with 300 DPI, then the pixels for the image will be 1200×1800.
As a photographer, if you are resizing a client’s photo for their yearbook submission, make sure to ask if the yearbook requirements have a minimum or maximum on INCHES for the photo. If they do not, I like to error on the bigger size rather than smaller. In general yearbooks will ask for a 2×3 inch photo with 300 DPI, so if the inches are not included in the requirements, I will choose to resize a photo to 6×9 inches, or even 8×12 inches, with 300 DPI.
If you are not using a high resolution photo provided by a professional photographer, and your image is already close to 2×3 inches, I would not recommending resizing your image to a bigger size, as this will provide a bigger, but lower quality image.
Directions for Changing the DPI in Photoshop
Open and Crop Your Image:
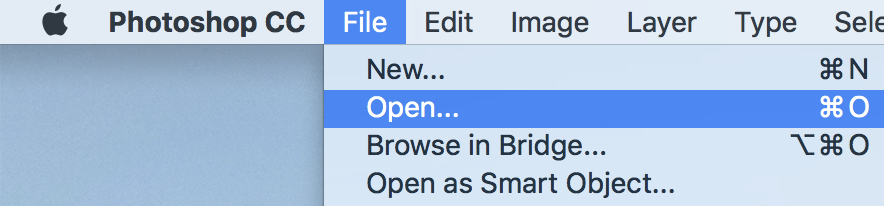
Once you have photoshop open, click “File” at the top and then “Open…” and find your image where it is stored on your computer or flash drive to open in photoshop. Once the image is open, make sure that the photo is cropped to the right dimensions that the yearbook requires. Most often, I have found that a yearbook will require the photo to be a vertical image cropped at 2×3. CROPPING IS NOT THE SAME THING AS RESIZING. You can crop (or confirm your dimensions are already correct) your image by choosing the crop tool from your tool bar menu. After you have selected the crop tool, you can choose the dimensions as well as the orientation at the top.

Keep in mind, some yearbooks have requirements on how much of the body is showing, if hands are allowed to be in the picture, or even as specific as how much of the face they want to take up the photo.
Resize and Adjust DPI:
Once your image is cropped, you will next select “Image” up at the top of your screen (to the right of “File”) and then select “Image Size…”. This will open a pop up menu, shown here:
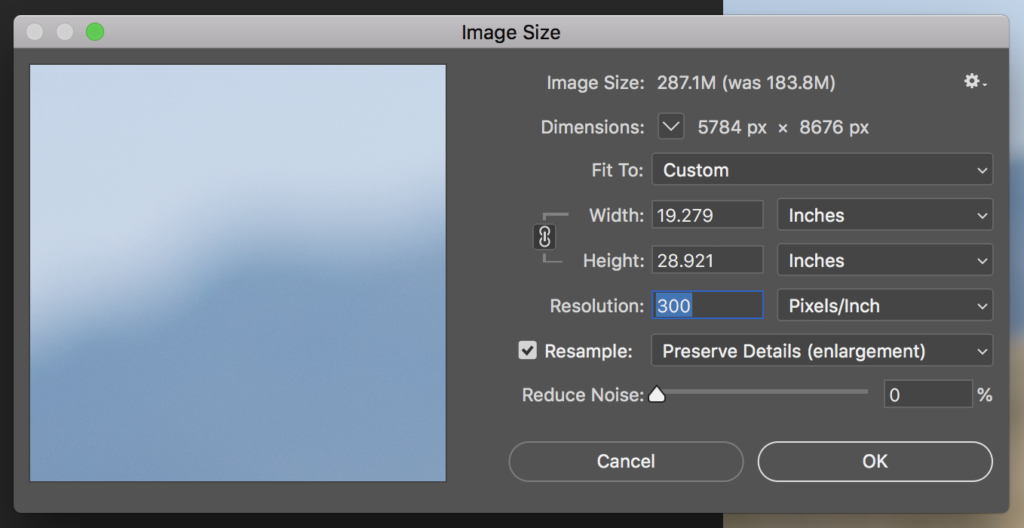
To resize and adjust the DPI you have a couple options. One is to choose to input the new size of inches you wish to resize it to (make sure that Inches is selected in the drop downs to the right of width and height), and then make sure to adjust your Resolution to 300 (THIS IS THE DPI) with the drop down to the right of resolution also having Pixels/Inch selected.
DO NOT deselect Resample. You want this box checked because it preserves details of your image, and if you unselect it YOU ARE NO LONGER ABLE TO CONTROL THE RESOLUTION AND INCHES AS INDIVIDUAL ADJUSTMENTS TO FIT YOUR NEEDS.
Next, select “OK”
Option #2: When you Select “Image Size…” and the pop up menu appears, you can also choose the “Fit To:” option and select “4×6 in 300 DPI” and then select “OK” (this is if you are okay with your image being 4 inches by 6 inches).
SAVE YOUR IMAGE:
Now that you have resized it and adjusted the resolution to 300 DPI you can save your image! Click “File” at the top and then “Save As…”. You can then rename and choose the location you want to save your yearbook ready photo!
Directions for Changing the DPI in Lightroom
When you are viewing your image of choice in Lightroom (in the editing, “Develop” mode), make sure your image is cropped to the right dimensions and orientation:

Next, choose “File” at the top and then “Export…”. Once you have chosen the name and location for your image, scroll down to the Image Sizing section. Choose the inches you wish your photo to be, and make sure to set the resolution to 300 (THIS IS THE DPI) with pixels per INCH selected.
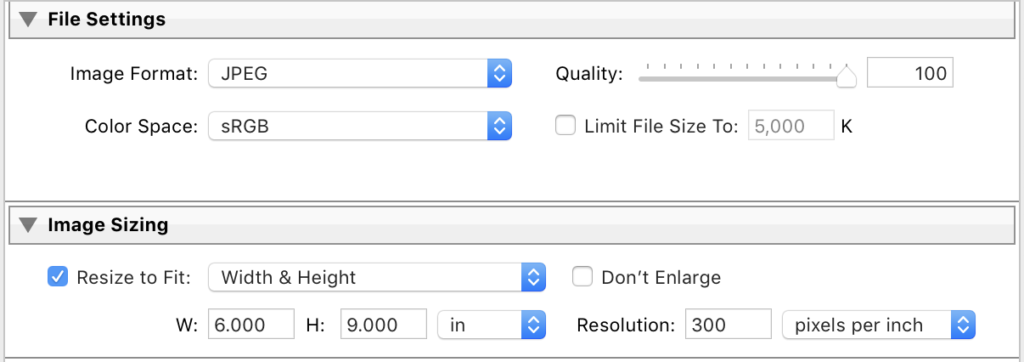
Don’t limit the file size, so that you can ensure it will be as high of quality as possible.
Click “Export” and you’re done!
Directions for Changing the DPI in Mac Preview
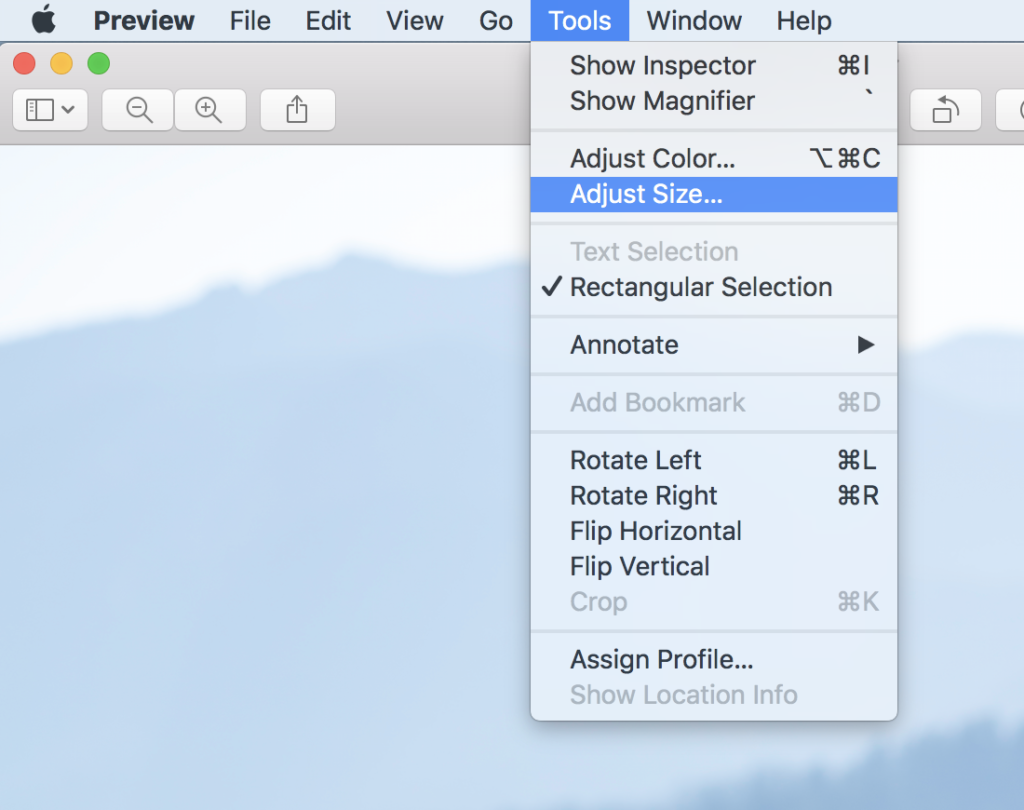
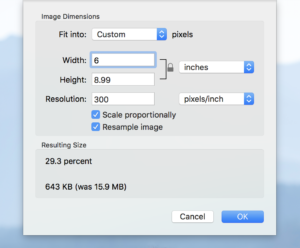
This is a super easy way to change your DPI on a Mac if you do not have Lightroom or Photoshop, and your photo is ALREADY cropped to the right dimensions (typically a photographer will deliver vertical images already cropped to a 2×3 ratio). Simply double click on your image from wherever it is stored on your Mac. It will open up the image in Preview. At the top of your screen, select “Tools” and then “Adjust Size…”. You will then have the option to change the width and hight to meet the INCHES required or desired (make sure inches is selected from the drop down menu to the right of Width and Height), and you can change the resolution to 300 (THIS IS THE DPI) making sure that “pixels/inch” is selected to the right of resolution.
Make sure to keep the “Scale proportionally” and “Resample image” boxes checked.
Then select “OK”
Your image title will now say that it is edited, so you can rename it and save it (Just make sure you can differentiate it from the original image title). DO NOT SIMPLY SAVE IT – MAKE SURE TO RENAME IT AND SAVE IT AS A NEW IMAGE. If you simply save it, then you will have lost your original, full-size image.
Submit To Your School
And that’s it! Now that you have resized your senior photo to meet the school’s 300 DPI requirement, you can upload your image and submit it. I hope this helped you understand more about DPI and helped make the reformatting process easier.